DIY Foaming Hand Soap Recipe
This page may contain affiliate links. If you make a purchase through one of our affiliate links, we’ll earn a commission, at no extra cost to you. For more details, please read our disclosure.
Of all the things that I did not know I NEEDED when having a baby, the most surprising was foaming hand soap! Yes, this simple item became a must-have necessity in my home when the first baby was born and now because of my little ones. My obsession with this product led me to find a simple, cost-effective solution…a DIY foaming hand soap recipe!
Maybe you get what I am saying because you have been there and done that. Or you don’t have kids, or perhaps you are on the other side of having little ones and this sounds a little crazy. Or maybe you have little ones and have not discovered this fantastic invention.
When my daughter was born, I underestimated the ability to use two hands to do pretty much anything ever again. When taking care of itty bitty little ones, it seems that they always need to be held for one reason or another, leaving you with only one available hand. So when it comes to washing hands, only foaming hand wash allows me to wash one hand at a time while juggling a child.
Even if I am afforded the freedom of a two-hand wash, I am constantly rushing around and the foaming hand soap is so much easier to quickly and thoroughly rinse off. This brings me to point #2; it is a must-have in our home to help little ones wash their hands. I hate using gel soap because of the fight to get the kids to actually get it all rinsed off.
I know—first-world problems for sure.
Since this is the only type of soap we will use going forward, I wondered if there was a better, cheaper way to do it. And there is, a DIY hand soap recipe!
Related: Best Natural Hand Soap without Harmful Chemicals
The Previous Way: Buying Foaming Hand Soap and Refills
In the very beginning, we used a brand of antibacterial foaming hand soap from a lovely shop that sells personal care items. It smelled so good that we would stock up during their periodic sales. Not necessarily the most economical, but it was a small thing that made me happy.
But then, I realized that antibacterial soap is not necessarily the best for the environment and people due to unnecessary chemicals that are used to make it antibacterial. As well as the fact that it hasn’t been proven to be any more effective than regular soap and water.
Also, learning how all those smell-good scents could actually be more chemicals that make the fragrance made me more interested in moving on to something different.
Then in the winter, I started having very dry hands that cracked a little and some little red bumps. So I decided that all the hand washing, you know with all those diaper changes, with that soap was too much for my skin and I needed to find something else.
Please note, I don’t know what that shop uses to make their scents and if it is definitely harmful chemicals, I just figured it wasn’t the right fit for my family any longer with my own experiences.
Finding a foaming hand wash that wasn’t antibacterial was a little difficult, and we ended up using the Method brand for $3-3.50 a bottle. A little more economical than the specialty store, but not great. I liked Method, but it is rated a 4 or 5 (depending on scent) out of a 10 point scale by the Environmental Working Group (EWG) which rates products based on toxicity concerns. Not the worst offender, but not great either. Again, there is that pesky fragrance issue, but I have not had any hand issues like with antibacterial soaps I have used in the past.
Then, to save money and be a little more considerate of the environment, I started keeping the foaming soap dispensers and just buying the refills. Each refill costs about $5-6 and refills almost 3 bottles. So, getting better at bringing down this necessary expenditure in the budget ends up being $1.67-2 per bottle.
With how my family goes through soap, I kept wondering, is there a better way?
Related: Ways to Save Money on Cleaning Products
The New Way: DIY Foaming Hand Soap Recipe
To save money in this area, I started looking into a DIY foaming hand soap recipe. There are several ways and range from making it from scratch with soap shavings or Castile soap and essential oils or just watering down your choice of gel hand soap.
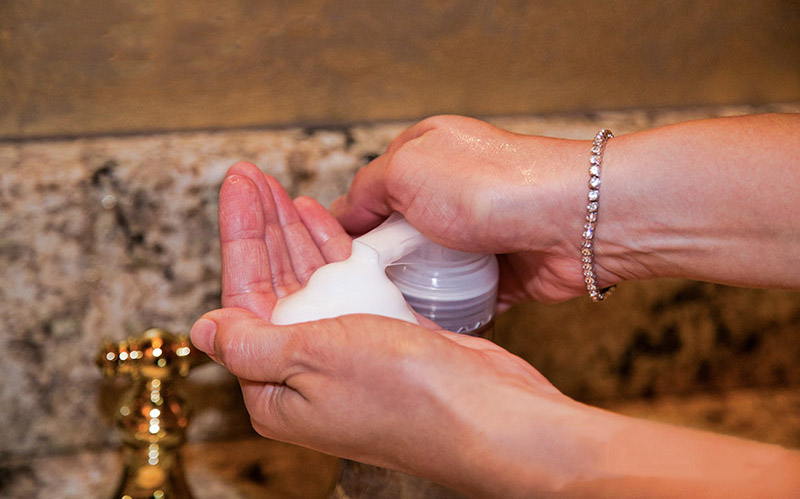
Yes, my friends, it is basically watered-down gel hand soap that comes out of a fancy soap dispenser that adds air to it to make foam. Hence why it is easier to rinse off; there is less soap that needs to rinse off.
It seems that it would be a cheaper soap product because it is less soap and mostly water. But because of the additional preservative needs, shipping costs, and storage fees for a bigger and heavier product, due to the water, it costs as much or more than the gel soap counterparts. Well, I figure I can add water to soap sooo…
Now to find a liquid hand soap that would work for my family. We have used the Everyone brand bath soap for years and I love the company’s transparency into the ingredients it uses, especially for fragrance. Also that they use plant extracts and pure essential oils. I never tried their hand soap before because it is a gel soap and I only go for the foaming variety. So, now to try Everyone Gel Hand Soap in a DIY hand soap recipe.
How To Make Your Own Foaming Hand Soap
1. Foaming Hand Soap Bottles
There are a number of these foaming soap bottles to choose from, from plastic to glass. Typically I would want to use glass, but with little ones with wet hands and soap in a bathroom with a tile floor, I think this would be a disaster in our home!
 Titanker Foaming Soap Dispenser
2. Get Your Preferred Brand of Gel Hand Soap
Feel free to pick any of your favorite gel hand soap brands or scents. All you do to make your foaming hand soap is add roughly 4 parts water to 1 part soap and put it in a foaming hand soap dispenser.
Depending on your soap brand, you may find that more or less water works better. If your foam is watery, then add a bit more soap to the mixture.
, Lavender and Coconut, Plant-Based Cleanser with Pure Essential Oils (Packaging May Vary)") Everyone Liquid Hand Soap, 12.75 Ounce (Pack of 3), Lavender and Coconut
Everyone Liquid Hand Soap, 12.75 Ounce (Pack of 3), Lavender and Coconut
I tried the everyone hand soap lavender + coconut scent that has an EWG Verified Seal (which means the Environmental Working Group reviewed this product and verifies that it does not have any ingredients of concern, the company provides full transparency and has good manufacturing practices). I was able to get 3 bottles for $10.32 on Amazon. Each bottle ended up costing me $3.44 and is 12.75 fl oz.
3. Get Water
Seems like an easy, no-brainer. But, as with any water-based product, there is an opportunity for bacteria and mold to grow. Therefore, you should use distilled water, reverse osmosis water, or boiled tap water (bring to a rolling boil for at least one minute, then cool before adding to foaming soap dispensers) to prevent adding unnecessary bacteria to your foaming soap.
") DEER PARK Brand Distilled Water
DEER PARK Brand Distilled Water
Keep in mind with water-based products, the general rule of thumb is only to leave sitting out at room temperature for around a week before completely using or dumping. Or you can keep it for a few weeks in the refrigerator.
I know, keeping your soap dispenser in the refrigerator isn’t practical. But maybe storing some of the soap mixture in the refrigerator for easy refills would work for you as it does for me (actually, I have several soap dispensers and will fill and leave them in the fridge and just grab and replace them when we run out at one of our sinks).
4. Pick Your Foaming Hand Soap Mixing Method
Method #1: Measure approximately four parts of water into your foaming soap dispenser. Then add 1 part liquid hand soap. Then swish and swirl gently to mix (vigorous shaking is not advised due to the bubbles it would cause). Also, make sure that you put the water in first; otherwise, you will be dealing with a bubbly, sudsy mess!
- In my 10 oz foaming soap dispenser this would be 8 oz of water (1 cup) and 2 oz of liquid hand soap (1/4 cup).
- If you will not use this much foaming hand soap in a week I would half the recipe to 4 oz of water (1/2 cup) and 1 oz liquid hand soap (2 TBSP)
- Also, when making this for the first time and measuring, it can be helpful to mark on your foaming soap dispenser where to fill it with water, then how high to fill it with soap for future refills made in the bottle.

Method #2: I like making a larger batch of my foaming hand soap so I can fill multiple foaming dispenser bottles at one time. I add 51 ounces (not quite 6 1/2 cups) of reverse osmosis water to a plunge pitcher, then add the total of 12.75 ounces of everyone hand soap (and about 1.25 ounces of additional water that is used to rinse the soap from the original container).
- I am able to fill 7 of my Method foaming soap dispensers (51 oz + 12.75 oz + 1.25 oz = 65 oz/7 bottles = 9.29 oz which is comparable to the Method refill bags, they refill 3x-ish the Method bottles which is around 9.33 oz). Which made my DIY non-toxic foaming hand soap refill cost only $0.49 per bottle! ($3.44/7 = $0.49).
- I like the plunge pitcher because it is easy to mix the soap into the water without getting in much air that would make bubbles. Using a spoon or other large utensil in a pitcher (for easy pouring) or a large bowl to slowly stir would work too.
- If you will not use this amount of foaming hand wash within a week, reduce the recipe size in half or more. Also, you can fill your foaming soap dispensers with 3-4 oz (or however much you want to use) of the mixture and leave the rest in the refrigerator for dispenser refills over the next few weeks.
Related: The Best Non-Toxic Dish Soap
(Optional) Personalizing Your DIY Foaming Hand Soap Recipe
The fun thing about DIY recipes is customization and tweaking for your wants and needs. Here are a few suggestions for getting creative with this DIY Foaming Hand Soap Recipe.
Essential Oils
It is great to be able to customize the scent of your DIY hand soap recipe with essential oils, and the possibilities are endless. Also, adjusting the scent for different seasons or purposes (think back-to-school germ-killing) is another great option when using essential oils.
") Plant Therapy Top 6 Organic Essential Oil Set
Plant Therapy Top 6 Organic Essential Oil Set
With our diluted version of the gel hand soap to make it be able to foam, the scent will not always be as strong as in gel form. Adding essential oils can help make a stronger scent when washing your hands. Or you could use an unscented gel hand soap that you can completely customize with your choice of essential oils.
Either way, mix your essential oil/s into the soap first to help the essential oils be dispersed in the water. The hand soap acts as an emulsifier, which is what helps oil (essential oil in this case) and water mix together. If you choose to add the essential oils last (or add in more to strengthen the scent), try to agitate the mixture as much as possible without creating too many bubbles and suds.
You can do up to a 4% dilution rate for your essential oils since this is a wash-off product, although for most this amount will be too strong. You will probably find that 20-40 drops in 8-10 oz of foaming soap mixture are more than sufficient. Keep in mind that many scented gel soap products use essential oils for their formulation, so I would stay more in the middle to lower end of the dilution rate range. If using an unscented gel soap base, then you can easily go up to the full 4% dilution rate if you find it necessary.
Depending on the soap you use it may be necessary to shake the soap container every once in a while to ensure the essential oils are mixed in.
Go to Plant Therapy for their affordable and wide selection of essential oils and free shipping (within the continental US) to get started with essential oils or pick up a new one.
Enhancements
Adding natural oils such as olive oil, fractionated coconut oil, jojoba oil, or any of your favorite carrier oils can make your soap more moisturizing and luxurious. Just add 1-2 tsp per 8-10 oz bottle of foaming hand soap.
Glycerin is another option to add to your soap for the great moisturizing benefits it provides. It helps to soften and smooth the skin too. And will help to thicken your foaming soap. Add 1/2 tsp to 1 tsp per 8-10 oz foaming hand soap mix.
Vitamin E (Tocopherol) is an excellent skin-loving antioxidant that promotes skin healing and moisturizes. It can also help prolong the shelf life of your DIY foaming hand wash due to its antioxidant properties (although on its own, it would not be able to preserve the product). Add 1/2 tsp to 1 tsp per 8-10 oz foaming hand soap mix.
Preservatives
There are several preservatives on the market today that can be added to DIY water-based products. This is great because we know bacteria can grow easily and quickly in water, and I don’t think any of us want to wash our hands in bacteria water.
It is also nice to be able to prolong the length of time you can leave out your DIY foaming hand wash so you do not have to dump it or store it in the refrigerator, especially for sinks that might not be used often. I am thinking about those sinks in my home that we use occasionally but not often as the kitchen and the main bathroom sinks.
It can be challenging to determine which preservative out there is the best option, especially if ingredients are a concern or cost.

Related: 10 Safe Shampoo and Conditioner Brands
Final Thoughts on DIY Foaming Hand Soap Recipe
Making your own DIY foaming hand soap is so much cheaper than purchasing it already created. I love mixing it up quickly (and having less to store since the gel hand soap containers are much smaller than large refill bags or containers). I usually have a few on hand with different scents that I can choose between depending on my mood that day or week.
It is also fun to try different things with this basic DIY foaming hand soap recipe, such as adding in some oils for extra moisture, especially during the winter months, or tweaking the scent by adding essential oils.